Interacting with Simphony Engine
Batch scripting
Mayavi mlab library provides an easy way to visualise data in a script in ways similar to the matplotlib’s pylab module. As illustrated with examples in View CUDS in Mayavi2, the user can easily adapt SimPhoNy CUDS datasets, files, or engines into a native Mayavi Source object, and then make use of the mlab library to set up the visualisation. More details on how to use mlab can be found on its documentation.
Here is an example for visualising a dataset from a SimPhoNy engine, updating the visualisation and saving the image while the engine is being run.
from mayavi import mlab

from simphony_mayavi.tests.testing_utils import DummyEngine
from simphony_mayavi.sources.api import EngineSource


# Comply to SimPhoNy modeling engine API
engine_wrapper = DummyEngine()

# Define EngineSource, choose dataset
src = EngineSource(engine=engine_wrapper,
                   dataset="particles")

# choose the CUBA attribute for display
src.point_scalars_name = "TEMPERATURE"

# use glyph to show the particles
mlab.pipeline.glyph(src, scale_factor=0.2, scale_mode='none')

# add legend
module_manager = src.children[0]
module_manager.scalar_lut_manager.show_scalar_bar = True
module_manager.scalar_lut_manager.show_legend = True

# set camera
mlab.view(-65., 60., 14., [1.5, 2., 2.5])

# save the figure
mlab.savefig("figures/particles_001.png")

# run the engine and update the visualisatioin
for i in range(2, 20):
    engine_wrapper.run()
    src.update()
    mlab.savefig("figures/particles_{:03d}.png".format(i))
Making a video is just a step away!
Interactive scripting
EngineManagerStandaloneUI
provides a user-friendly and interactive approach to manage multiple engines, visualise
datasets from a particular engine, locally run an engine and animate the results.
Multiple engines can be added to or removed from the manager using
add_engine and
remove_engine.
Example (Interactive: EngineManagerStandaloneUI)
from simphony_mayavi.tests.testing_utils import DummyEngine
from simphony.visualisation import mayavi_tools

# GUI for Interacting with the engine and mayavi
gui = mayavi_tools.EngineManagerStandaloneUI()

gui.show_config()

# you can add an engine from the python shell
engine_wrapper = DummyEngine()

# "test" is used as a label for representing the engine in the GUI
gui.add_engine("test", engine_wrapper)

# you can remove the engine from the GUI
# Notice that this may not destroy the instance if the instance
# is referenced elsewhere (i.e. ``engine_wrapper``)
gui.remove_engine("test")
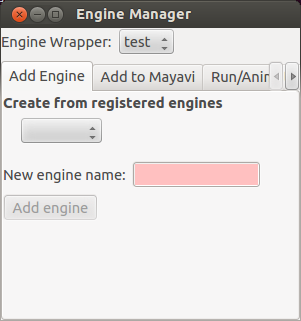
Panel for adding more engine wrappers.
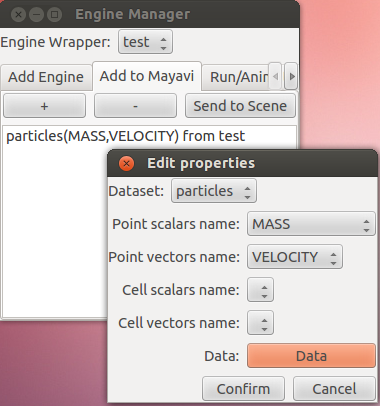
Use EngineManagerStandaloneUI to add datasets to Mayavi.
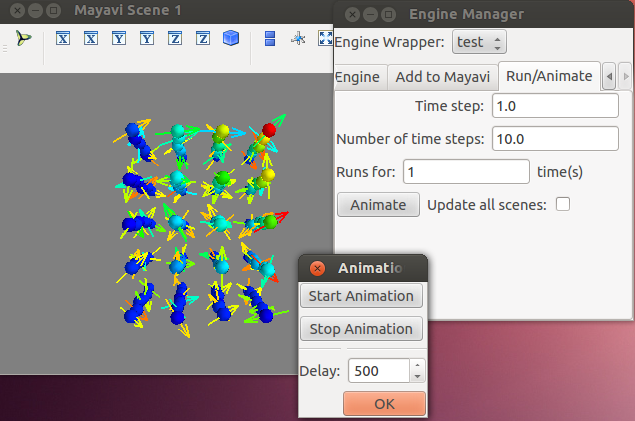
Use EngineManagerStandaloneUI to run the engine and animate the results.
Simphony GUI within Mayavi2
A GUI essentially identical to the
EngineManagerStandaloneUI
is provided for the Mayavi2 application.
In order to use it, one needs to first activate the plugin in
Preferences, following the instructions in Open CUDS Files in Mayavi2.
After that, restart Mayavi2. Then the EngineManager panel can be added by selecting
View –> Other... –> Simphony.
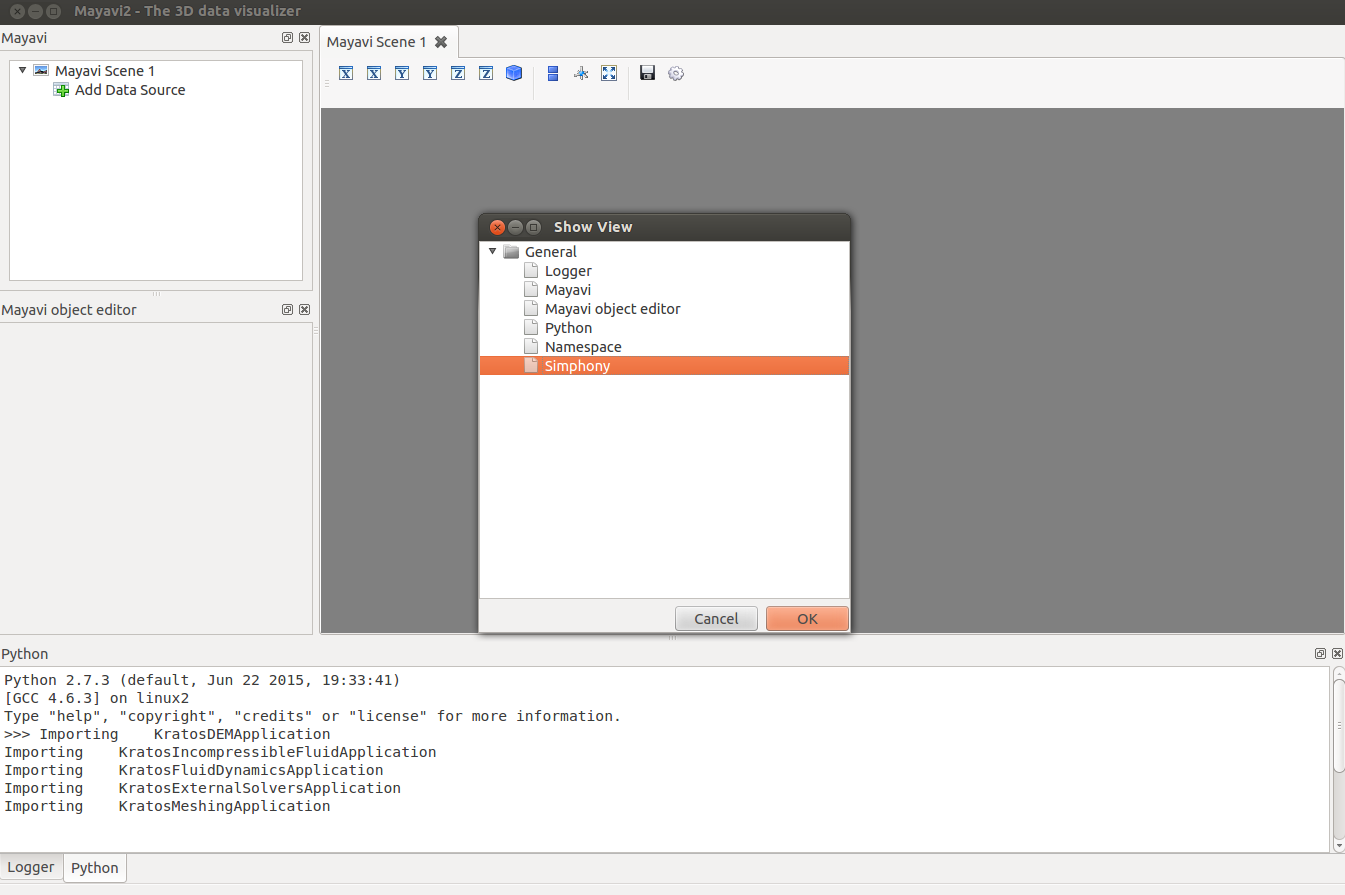
Add the Simphony panel to Mayavi2
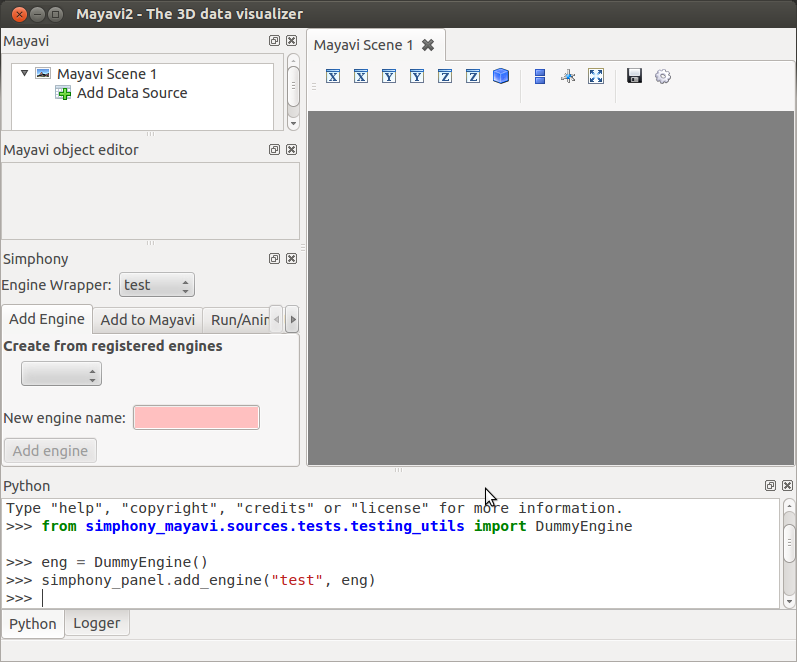
The panel is identical to the EngineManagerStandaloneUI
The Simphony panel is binded to the embedded Python shell within Mayavi2 as
simphony_panel. Alternatively the user can access the panel from
simphony.visualisation.mayavi_tools.get_simphony_panel.
With that the user can use the same methods as
described in enginemanagerstandaloneui, such as
add_engine
and remove_engine.
Alternatively, the user can setup and load a SimPhoNy engine to Mayavi2 by running a python script from a shell or via Mayavi2 (File->Run Python Script).
The add_engine_to_mayavi2
method in the simphony.visualisation.mayavi_tools namespace is provided for
this purpose as illustrated in the following example.
""" Modified from simphony-lammps-md/examples/dem_billiards/dem_billiards.py
Requires file:
github.com/simphony/simphony-lammps-md/examples/dem_billiards/billiards_init.data
"""
import os

from mayavi.scripts import mayavi2

from simphony.engine import lammps
from simlammps import EngineType
from simphony.core.cuba import CUBA
from simphony.visualisation import mayavi_tools

# read data
particles = lammps.read_data_file(
    os.path.join(os.path.dirname(__file__),
                 "billiards_init.data"))[0]

# configure dem-wrapper
dem = lammps.LammpsWrapper(engine_type=EngineType.DEM)

dem.CM_extension[lammps.CUBAExtension.THERMODYNAMIC_ENSEMBLE] = "NVE"
dem.CM[CUBA.NUMBER_OF_TIME_STEPS] = 1000
dem.CM[CUBA.TIME_STEP] = 0.001

# Define the BC component of the SimPhoNy application model:
dem.BC_extension[lammps.CUBAExtension.BOX_FACES] = ["fixed",
                                                    "fixed",
                                                    "fixed"]
dem.BC_extension[lammps.CUBAExtension.BOX_VECTORS] = None

# add particles to engine
dem.add_dataset(particles)

# Run the engine
dem.run()


@mayavi2.standalone
def view():
    mayavi_tools.add_engine_to_mayavi2("lammps", dem)


if __name__ == "__main__":
    view()
This example sets up a Simphony LAMMPS engine and starts Mayavi2 with the engine loaded in the GUI.